

This work is licensed under a Creative Commons Attribution-NonCommercial-ShareAlike 3.0 Unported License.
The following is a basic list of tools & materials used in the making of my realistic costume wings.
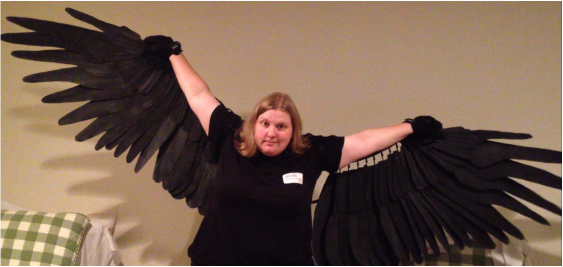
My corvid-style wings without arm-covers (still designing)
Materials themselves are variable and can change depending on the type of wings you're making, how you want them to look, your budget, etc. I'll include alternate materials when applicable and prices whenever possible. This list is organized in order of appearance in the tutorials themselves, from "part 1 - CONCEPT" onwards.
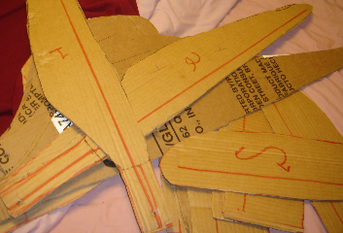
- CARDBOARD: A single appliance box (like a refrigerator - hardware stores may set one aside for you, if you ask - you can honestly say it’s for an art or costume project) should provide enough for one wing worth of feather patterns, though the amount depends on your wing-style and size. They also sell cardboard sheets at Staples for an affordable price.
Price: Free-$10 ~ Source: Hardware/Electronics store, or from recycling locations
Price: Free-$10 ~ Source: Hardware/Electronics store, or from recycling locations

- YARDSTICK: A basic wooden yardstick.
Price: Less than $3.00 ~ Source: Hardware store
Price: Less than $3.00 ~ Source: Hardware store
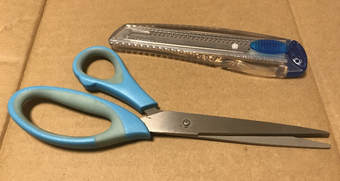
- SCISSORS or BOX-CUTTER: A sturdy, comfortable pair of scissors or bladed box-cutter to cut your cardboard with, whichever you prefer.
Price: $5.00-$10.00 each (low-quality/cheap pricing)
Source: Hardware store/Office supply
Price: $5.00-$10.00 each (low-quality/cheap pricing)
Source: Hardware store/Office supply
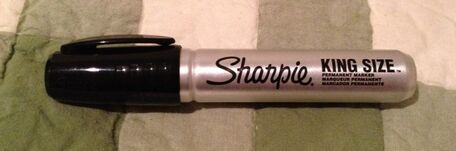
- Permanent Marker: For marking cardboard, wire, etc.
Price: $2.49 for two
Source: Hardware/Office Supply store, etc.
Price: $2.49 for two
Source: Hardware/Office Supply store, etc.

- POSTER-BOARD: One 22" X 28" sheet should be enough to trace & cut out one wing worth of covert patterns. Also useful for correcting any over-cuts on your cardboard feather patterns.
Price: $1-$5 (depending on quantity & store pricing)
Source: Office supply
Price: $1-$5 (depending on quantity & store pricing)
Source: Office supply
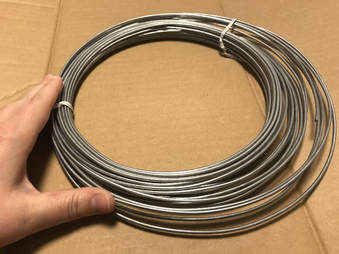
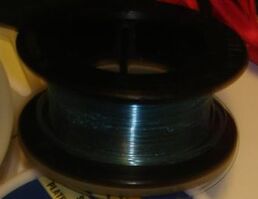
- 10-12 GAUGE THICK WIRE: Use your measurements from part 1 to determine how much you need. 10 gauge is thicker than 12, and is only really needed for feathers longer than 38" or under more stress (like your leading feather). Wire hangers (like from dry cleaners) are usually thick enough and can be straightened and used. Otherwise new in 100 ft rolls are commonly found at your local hardware store.
Price: Hangers = Free if you got' em, $36 for 100 on amazon if you don't | 12-gauge multipurpose wire rolls 100 ft long ~$13
Source: Home Depot
Price: Hangers = Free if you got' em, $36 for 100 on amazon if you don't | 12-gauge multipurpose wire rolls 100 ft long ~$13
Source: Home Depot
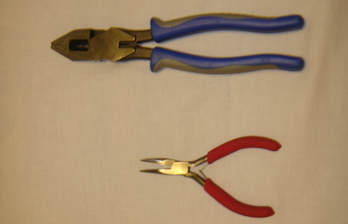
- HEAVY DUTY PLIERS: Also known as "lineman's pliers", for bending rolls of wire (or wire hangers) straight. Patient, steady hands are useful here.
Price: $8-$16 (varies depending on brand & quality)
Source: Hardware Store/Craft supply
- WIRE CUTTERS: Usually included on the heavy-duty pliers.
OPTIONAL: SMALL PLIERS: to provide a bit more grip when you need it - I used bent needle nose pliers.
Price: $8-$16 (varies depending on brand & quality)
Source: Hardware Store/Craft supply
- WIRE CUTTERS: Usually included on the heavy-duty pliers.
OPTIONAL: SMALL PLIERS: to provide a bit more grip when you need it - I used bent needle nose pliers.
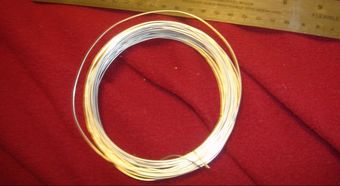
- 20-24 GAUGE WIRE: Used for wrapping the first primary feather (since it is made of many separate 12 gauge wires), "galvanized steel" works fine and is usually the cheapest and most commonly available.
Price: $5-$10 (varies depending on length & material)
Source: Hardware Store/Craft supply
Price: $5-$10 (varies depending on length & material)
Source: Hardware Store/Craft supply
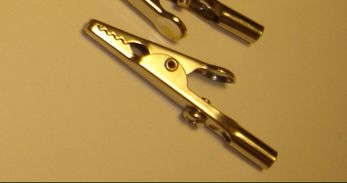
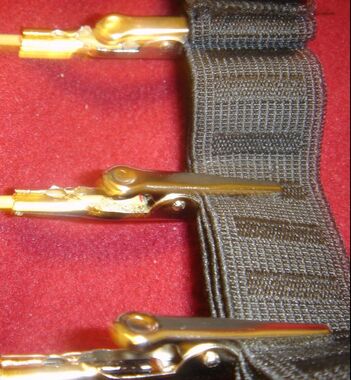
OPTIONAL: 1-2 inch Alligator Clips: While all the feathers can be attached to the wing by bending an extra bit of wire around the bolt or elastic, having alligator clips makes replacing old/damaged secondary feathers much easier. Can be expensive though, so those on a budget or one-shot projects may want to skip.
Price: varies, depending on size and quantity ~ $5 for a 4-pack
Source: Hardware Store
Price: varies, depending on size and quantity ~ $5 for a 4-pack
Source: Hardware Store
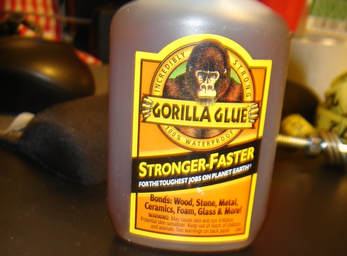
OPTIONAL: GLUE: Used for cementing the Alligator Clips to the wire feather shafts. I used Gorilla Glue, but any strong bonding glue that works on metal should work. When in doubt, try it out.
Price: varies depending on brand and amount ~ $7 (a 2 oz bottle is plenty)
Source: Hardware Store/Craft supply
Price: varies depending on brand and amount ~ $7 (a 2 oz bottle is plenty)
Source: Hardware Store/Craft supply
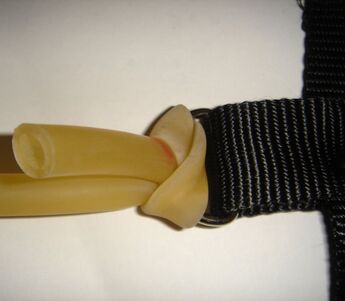
- Latex Hose/Tube: 2 feet for the stretchy part of the harness
Price: $2-$3/ft
Source: Hardware Store
Price: $2-$3/ft
Source: Hardware Store
- Elastic: To attach the secondary feathers to, length 5-6 feet (depending on the length of your arms, more if you want to use elastic rather than latex hose), width at least 1-inch
Price: $3-$5/yd (varies depending on length, width, and style)
Source: Fabric/Craft store
Price: $3-$5/yd (varies depending on length, width, and style)
Source: Fabric/Craft store
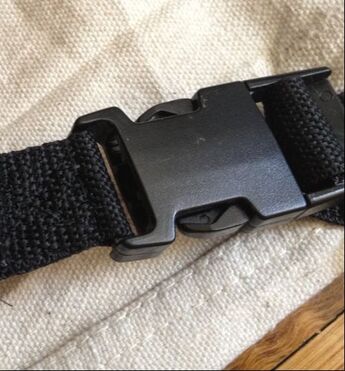
- Parachute Buckles: Four, 1-inch size
Price: $2-$4 each
Source: Fabric/Craft store, online, etc.
Price: $2-$4 each
Source: Fabric/Craft store, online, etc.
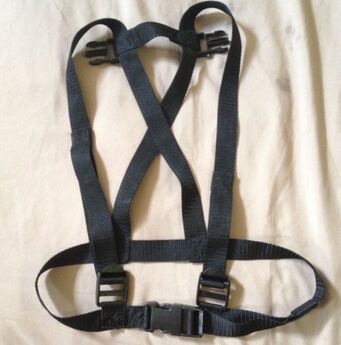
- Strap Material: I used 6 yards of polypropylene webbing from the craft store, most common width is 1-inch.
Price: $1-$2/yd (varies depending on length, width, and style)
Source: Fabric/Craft store, online, etc.
Price: $1-$2/yd (varies depending on length, width, and style)
Source: Fabric/Craft store, online, etc.
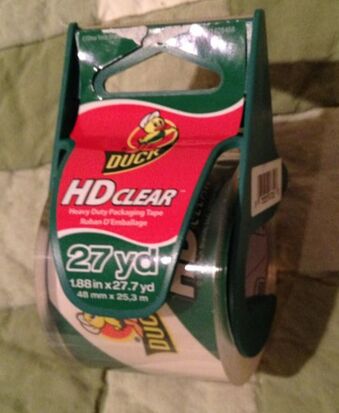
- Tape: To stop the strap material from fraying while cutting it (a big problem with polypropylene webbing) - brown packing tape or plastic tape works well, until the raw edges can be treated (in polypropylene's case, melted).
Price: $6-$7/roll (varies depending on length, width, and style)
Source: Craft/Hardware Store, grocery store, etc.
Price: $6-$7/roll (varies depending on length, width, and style)
Source: Craft/Hardware Store, grocery store, etc.
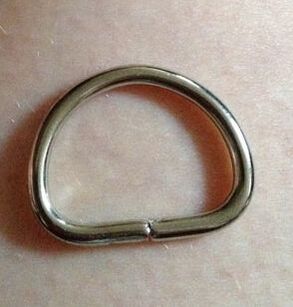
- Metal D-rings: Four, 1-inch size
Price: $2-$3 for 4
Source: Craft/Fabric Store, online
Price: $2-$3 for 4
Source: Craft/Fabric Store, online

- Sewing Needles: Thick, heavy duty needles preferred, to make it easier to punch through many layers of straps/webbing.
Price: usually $5 for a set
Source: Craft/Fabric Store, online
Price: usually $5 for a set
Source: Craft/Fabric Store, online
- Thread/Fishing line: Basic thread from the craft store, used 12 lb Trilene fishing line but any strong thread-like material should work fine.
Price: ~$2 per 50 yard roll
Source: Craft/Fabric Store, online
Price: ~$2 per 50 yard roll
Source: Craft/Fabric Store, online
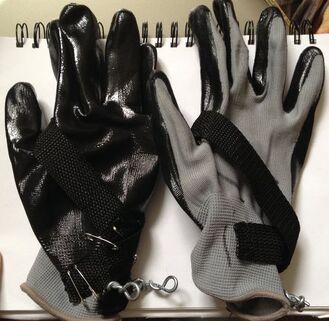
- Pair of Gloves: I found it MUCH easier to just buy a pair of gloves instead of the fingerless one I used in part 3 of the tutorial, and the fingers help keep the glove/pivot point from sliding around. Paired with a velcro wrist (think baseball batting gloves) is recommended for easier donning/shedding of the costume for breaks while staying secure when in use.
Price: ~$5 for simple gardening gloves, $8-$15 for generic work glove w/velcro clasp on the wrist
Source: Craft/Hardware store, online
Price: ~$5 for simple gardening gloves, $8-$15 for generic work glove w/velcro clasp on the wrist
Source: Craft/Hardware store, online
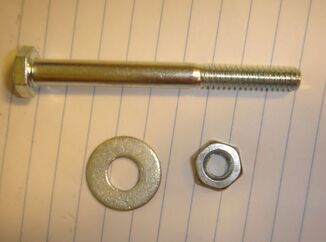
- Two 1/4" Hex Bolts: About 2.5 inches long, a quarter inch diameter, one for each pivot point.
- 1/4" Wing Nuts: About 2.5 inches long, a quarter inch diameter, one for each pivot point.
- Metal Washers: Eight, should fit over the quarter inch bolts.
Price: less than a dollar each
Source: Hardware store
- 1/4" Wing Nuts: About 2.5 inches long, a quarter inch diameter, one for each pivot point.
- Metal Washers: Eight, should fit over the quarter inch bolts.
Price: less than a dollar each
Source: Hardware store

- Ribbon: One spool of narrow, strong, non-stretch ribbon (satin works pretty well, thick ribbon can be folded in half), 3-4 yards is plenty, used to thread the feathers of the wings.
Price: ~$3-$5 per roll
Source: Craft store
Price: ~$3-$5 per roll
Source: Craft store
|
- Coffee Stirring Straws: I used this for the shafts of my covert feathers, but anything this size & general shape will do.
Price: $6/box Source: Grocery Store, Online |
- Stapler: For attaching coverts to the primary feathers.
Price: varies depending on style, $15+ for the long-arm ones Source: Office supply, online |
WIP Arm-Cover section
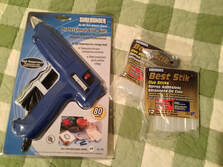
- Hot Glue Gun & Glue Sticks: So useful, for all sorts of crafty things (listed here for ease of attaching fabric feathers to an arm cover).
Price: $20 + $4.55/pack
Price: $20 + $4.55/pack
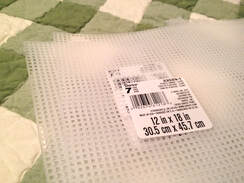
- Plastic Mesh: Two 2ft-by-1ft sheets of plastic mesh (makes 4 panels, one for each forearm and upper-arm).
- Felt: Four yards of felt in your wings color.
